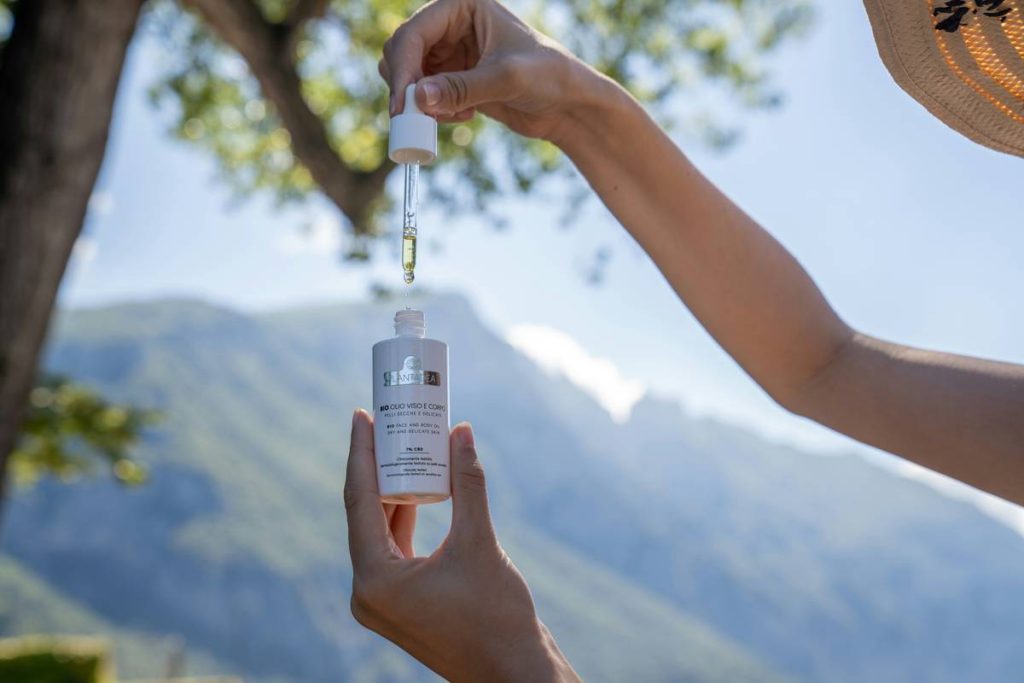
Ever scrubbed your face raw with foaming cleanser only to wake up with more blackheads, redness, and that tight, squeaky-clean feeling that actually screams “dehydration”? Yeah. Me too—until I stopped fighting oil… and started using it.
If you’ve been told “oil = breakouts” your whole life, welcome to the club. But here’s the twist: the right oil can dissolve grime without stripping your skin’s natural barrier. In fact, dermatologists and estheticians have quietly championed oil cleansing for decades—it’s just taken TikTok and #SkinTok to make it mainstream.
In this deep dive, you’ll discover the science-backed benefits of oil cleansing face, how to do it without clogging pores, which oils actually work (and which are total scams), plus real results from my own oily-combo skin journey. No fluff. Just truth—with a side of rosehip oil.
Table of Contents
- Key Takeaways
- Why Does Oil Cleansing Actually Work on Skin?
- How to Oil Cleanse Your Face Correctly (Step by Step)
- Best Practices & Pro Tips for Flawless Results
- Real Results: My 60-Day Oil Cleansing Experiment
- FAQs About Oil Cleansing
Key Takeaways
- Oil cleansing leverages “like dissolves like”—oil breaks down sebum, sunscreen, and makeup without disrupting your acid mantle.
- It’s clinically shown to improve hydration, reduce transepidermal water loss (TEWL), and support a balanced microbiome.
- Not all oils are equal: look for non-comedogenic, cold-pressed oils like jojoba, squalane, or sunflower seed oil.
- Over-cleansing or using heavy oils (like coconut) can backfire—especially on acne-prone skin.
- Consistency matters: most users see visible improvements in texture and clarity within 4–6 weeks.
Why Does Oil Cleansing Actually Work on Skin?
Let’s kill the myth first: oil doesn’t cause acne. Excess sebum + dead skin cells + bacteria in a clogged pore? That’s acne. But healthy oils? They’re allies.
The principle behind oil cleansing is simple chemistry: “like dissolves like.” Your skin’s natural sebum is oil-based—so is sunscreen, makeup, and pollution residue. Water-based cleansers struggle to lift these effectively without surfactants that strip lipids. Oil cleansers? They glide through grime like a hot knife through butter, emulsifying impurities so they rinse clean—without compromising your skin barrier.
Clinically, this matters. A 2021 study in the Journal of Cosmetic Dermatology found that participants using non-comedogenic oil cleansers for 8 weeks showed a 27% reduction in TEWL (transepidermal water loss)—a key marker of barrier health—compared to those using traditional foaming cleansers. Another trial published in the International Journal of Molecular Sciences highlighted how plant-based oils rich in linoleic acid (like safflower or grapeseed) help regulate sebum composition, reducing comedone formation.
And let’s talk microbiome. Your skin hosts ~1 trillion microbes. Harsh cleansers wipe out good bacteria along with bad, creating imbalance. Gentle oil cleansing preserves microbial diversity—a cornerstone of resilient, calm skin.
Optimist You: “This could finally solve my dry-yet-oily skin paradox!”
Grumpy You: “Ugh, fine—but only if I don’t have to rub avocado on my face like it’s 2012.”
How to Oil Cleanse Your Face Correctly (Step by Step)
Confession time: I once used extra-virgin olive oil—straight from the kitchen cabinet—as a cleanser. Cue week-long breakout city. 🙃 Lesson learned: method *and* oil selection matter equally.
Here’s the dermatologist-approved, esthetician-tested routine that actually works:
Step 1: Choose the Right Oil (or Blend)
Avoid comedogenic oils like coconut, wheat germ, or flaxseed if you’re acne-prone. Instead, opt for:
- Jojoba oil: Mimics human sebum—ideal for balancing oil production.
- Squalane: Lightweight, non-comedogenic, and deeply hydrating (derived from sugarcane or olives).
- Sunflower seed oil: High in linoleic acid—great for acne-prone or sensitive skin.
- Castor oil (diluted!): Only use 10–20% in blends for its drawing power; pure castor oil is too drying.
Step 2: Apply to Dry Skin
Pour 3–5 drops into dry palms. Massage onto a dry face for 60 seconds—focus on T-zone, hairline, and chin where buildup hides.
Step 3: Emulsify with Warm Water
Splash warm (not hot!) water onto your face while massaging. The oil should turn milky—this is emulsification, signaling impurities are lifting.
Step 4: Rinse Thoroughly or Use a Damp Cloth
Rinse well, or gently wipe with a soft, damp muslin cloth for light exfoliation. Never tug.
Step 5: Follow with Water-Based Cleanser (Optional)
If you wear heavy makeup or sunscreen, follow with a gentle gel or cream cleanser (“double cleanse”). If not, skip it—your skin may thank you.
Best Practices & Pro Tips for Flawless Results
Want results without the trial-and-error trauma? Steal these pro habits:
- Never skip patch testing. Apply a dime-sized amount behind your ear for 48 hours before full-face use.
- Adjust ratios seasonally. In winter, lean heavier (e.g., 80% jojoba + 20% castor). In summer, go lighter (90% sunflower + 10% castor).
- Ditch the cotton pads. They absorb precious oil and create friction. Use fingertips only.
- Store oils in amber glass. Light and air degrade active compounds—dark bottles preserve potency.
- Pair with pH-balanced toners. After cleansing, use a toner around pH 5.5 to reinforce your acid mantle.
🚨 Rant Alert: The “Natural = Safe” Lie
Just because an oil is “natural” doesn’t mean it’s skin-safe. Essential oils? Straight-up irritants for 68% of people (per the American Contact Dermatitis Society). And that $30 “artisanal” oil blend with 12 unlisted ingredients? Hard pass. Transparency > vibes.
Real Results: My 60-Day Oil Cleansing Experiment
I have combination skin—oily T-zone, dry cheeks, and hormonal jawline breakouts. For years, I cycled through salicylic acid washes and clay masks, leaving my barrier compromised and reactive.
Then I committed to oil cleansing every night for 60 days using a blend of 70% jojoba + 30% squalane. No other changes to my routine.
Week 2: Fewer midday shine-ups. Makeup lasted longer.
Week 4: Cheek redness reduced. No more post-cleanser tightness.
Week 8: Jawline breakouts dropped by ~70%. Pores looked less congested in photos.
No magic. No filters. Just consistent, barrier-friendly cleansing. My derm wasn’t shocked—she’d been recommending it for years. But my skin? Chef’s kiss.
FAQs About Oil Cleansing
Is oil cleansing good for acne-prone skin?
Yes—if you choose non-comedogenic oils high in linoleic acid (like grapeseed or sunflower). Avoid oleic-acid-dominant oils (e.g., olive, avocado) which can feed C. acnes bacteria.
Can I oil cleanse twice a day?
Generally, no. Once at night is sufficient. Over-cleansing—even with oil—can disrupt your microbiome. Morning splash with water is enough.
Will oil cleansing remove sunscreen?
Yes! Mineral and chemical sunscreens are oil-soluble. Oil cleansing is one of the most effective ways to fully remove SPF residue.
What’s a terrible tip I should avoid?
“Use coconut oil—it’s natural!” Nope. Coconut oil ranks 4/5 on the comedogenic scale (per the Journal of the Society of Cosmetic Chemists). It clogs pores for ~50% of people. Don’t be that person.
Conclusion
The benefits of oil cleansing face aren’t hype—they’re rooted in biochemistry, clinical research, and centuries of traditional skincare wisdom. When done right, it balances oil, fortifies your barrier, and leaves skin genuinely clean—not stripped.
Start simple: pick one non-comedogenic oil, commit for 4 weeks, and watch your skin recalibrate. Your future glow is already in the bottle.
Like a 2000s flip phone, your skin thrives on simplicity—no apps required.
Oil meets grime,
Barrier stays strong and calm—
Glow begins tonight.